Table of Contents
Cordyceps, a type of mushroom, has gained immense popularity in the United States for both cultivation and consumption. As the demand for cordyceps continues to rise, it is increasingly being offered as a supplement in co-ops and various grocery stores. Social media platforms are flooded with individuals attempting to unravel the secrets of cordyceps cultivation. Is cordyceps cultivation really that hard? Let’s take a better look!
What’s Cordyceps?
Cordyceps encompasses a genus of mushrooms, with Cordyceps sinensis and Cordyceps militaris being the most commonly referred to species. These mushrooms deviate from conventional cap and stem mushrooms and possess distinctive characteristics. Belonging to the group of “sac fungi” or “ascomycetes,” they share ancestry with renowned fungi like morels and truffles.
The fruiting body of Cordyceps, known as an “ascocarp,” can be informally called a mushroom for our purposes. Typically, it takes the form of a long, slender structure that extends from its host, although it can also exhibit a club-like shape. Cordyceps mushrooms are parasitic, relying on a living host that ultimately succumbs to the fungus. The host is often an insect, tree, or even another fungus.
How to Grow Cordyceps?
Cultivating Cordyceps militaris is remarkably straightforward. You won’t require a flow hood, wood substrate, or excessive space. The key challenge lies in maintaining the temperature within the range of 60 to 70°F (15-21°C) for a duration of three months, which is the most critical aspect. This mushroom colonizes and produces fruit at the same temperature, but if the temperature exceeds 70°F (21°C), it tends to develop a fuzzy white appearance. Ideally, we want to avoid this outcome. On the other hand, if the temperature drops below 60°F (15°C), the mycelium growth will be sluggish, and fruiting may be hindered.
Required Equipment
- 11 mason jars (1 jar for mixing)
- Pressure cooker/sterilizer capable of holding quart-sized jars
- Fruiting substrate for 9 quart-sized jars
- 9 autoclavable grain spawn lids (with injection port and air exchange patch)
- Tinfoil
- 1 metal mason jar lid and ring
Ingredients
- 15g potato starch
- 28.5g dextrose
- 9.5g yeast
- 2 tsp gypsum
- 6g soy peptone
- 800 mL water (80 mL per jar, for 10-quart jars)
- 45g brown rice in each jar
Instructions
- Put the brown rice into each jar and set aside.
- Place all the remaining dry ingredients in a mason jar and fill the jar with water to make 800 mL of solution.
- Put a lid on the jar and shake it well to mix the ingredients thoroughly.
- Measure and pour 100 mL of solution into each jar containing 45 g brown rice.
- Place autoclavable injection port and air exchange lids on each jar, and cover them with tinfoil “hats.”
Cordyceps Growing Steps
1. Sterilization
Prepare the jars, each containing 45 grams of brown rice and 80 milliliters of nutrient solution. Secure the grain spawn lids onto the jars and cover them with tinfoil hats. The tinfoil acts as a barrier to prevent any liquid from entering the jar through the filter patch. They are now ready for sterilization. Transfer the jars to a pressure cooker and sterilize them at 15 psi for a duration of 120 minutes. Allow the jars to cool down to room temperature, and then proceed to inoculate each jar using a spore syringe filled with Cordyceps militaris liquid culture.
2. Inoculation
During the inoculation process, it is crucial to maintain a high level of sterility. While it is ideal to perform the inoculations in front of a laminar flow hood or in the still-air box, open-air inoculations can also be successful, especially if using lids with self-healing injection ports. To minimize the risk of contamination always wear a mask and nitrile gloves.
Find a clean area in your home with relatively still air, such as a kitchen table. Clean the surface with rubbing alcohol and sanitize your hands as well. Spray rubbing alcohol on the jars and injection ports, letting them sit for around 2 minutes to ensure that they’re sterilized thoroughly. Take your liquid culture and inject 2 cc’s of liquid culture into a jar. To sterilize the syringe tip, use a lighter or torch to heat it until it turns red hot. Allow a moment for the syringe tip to cool down, and then proceed to inject 2 cc’s of liquid culture into the next jar. Repeat this process until all jars are successfully inoculated.
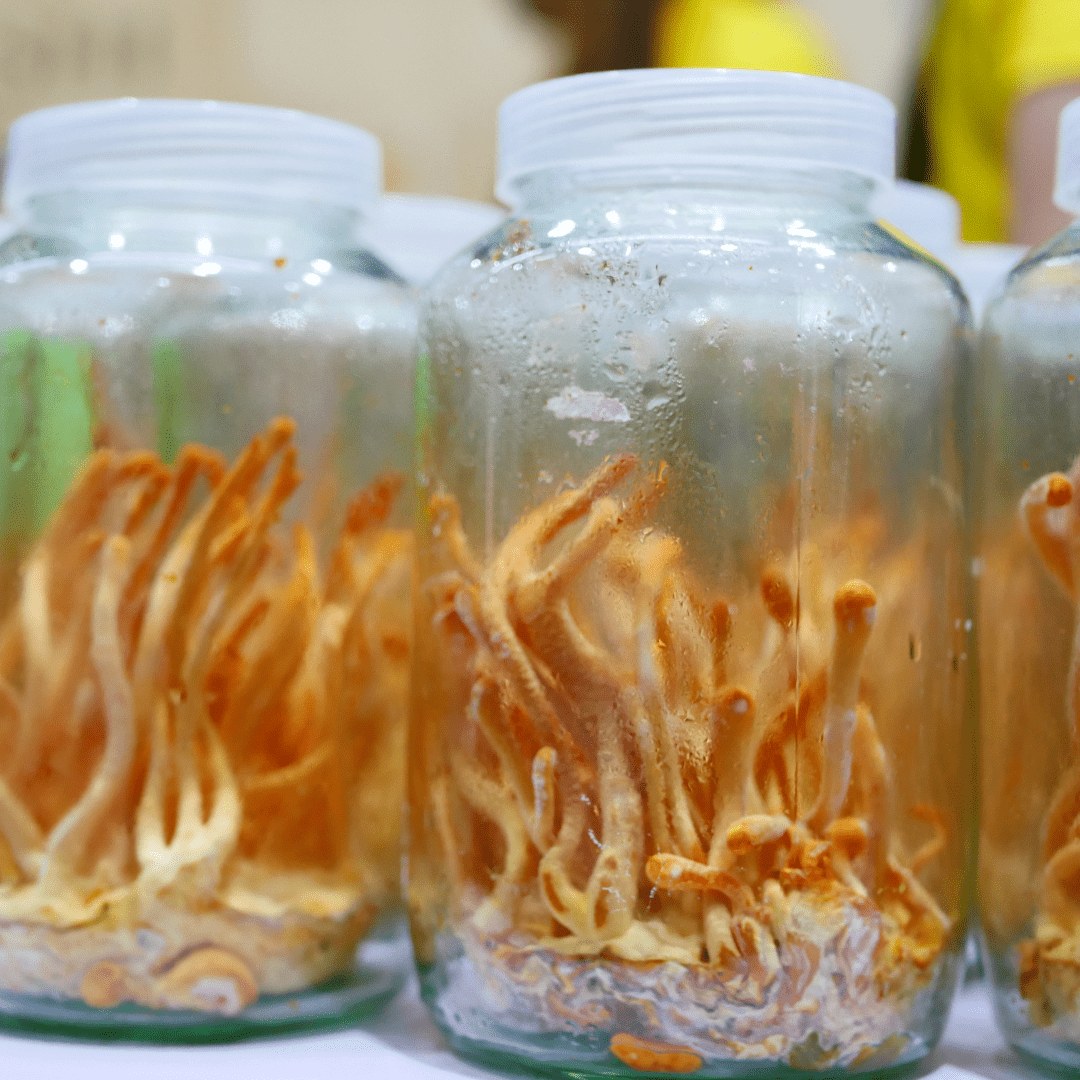
3. Colonization and Fruiting
Store the inoculated jars in a completely dark area, maintaining a temperature range of 60 to 70°F (15-21°C), for a period of 3 to 4 weeks, or until the rice appears fully colonized. Once the substrate has been fully colonized, relocate the jars to a location where they can receive 10 to 12 hours of either natural or artificial light each day. After approximately 6 to 8 weeks, you will have your own homegrown Cordyceps mushrooms!
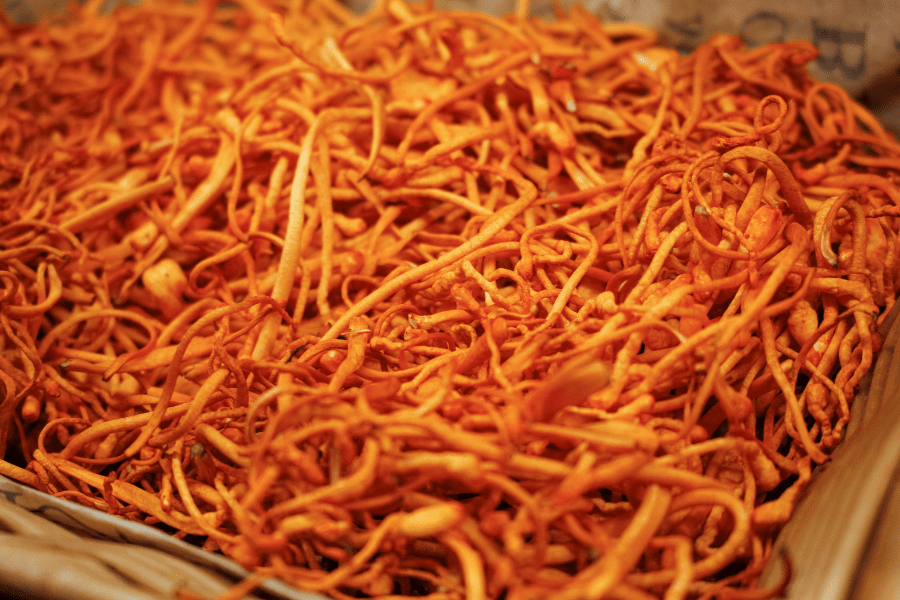
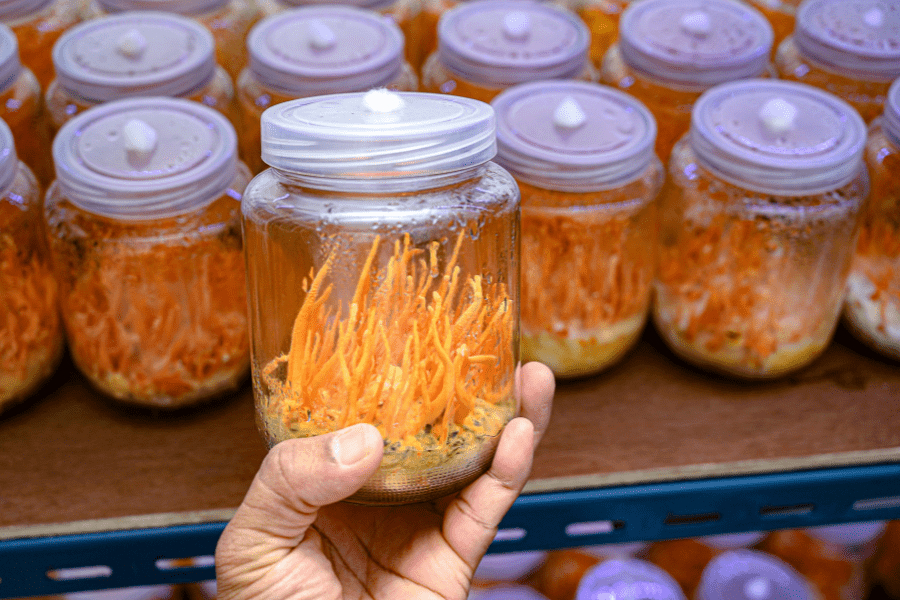
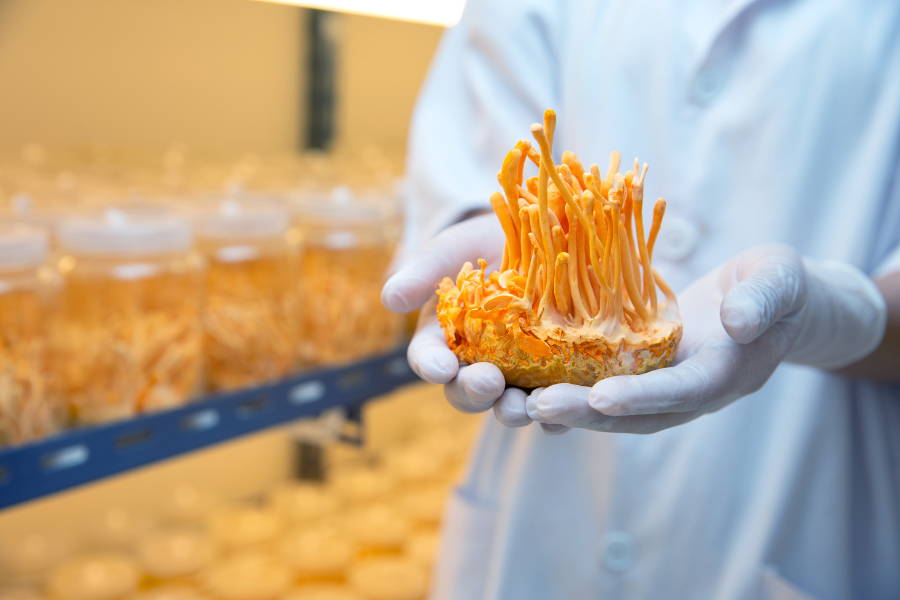
4. Harvest
Harvest the Cordyceps mushrooms once they have reached their full size. The key indicator that a Cordyceps militaris mushroom is ready for harvest is when its surface becomes shaggy and a club head starts forming at the top. To harvest the mushrooms, firmly grip them at the base and break them off from the substrate. You can also use a knife in order to remove the substrate and harvest your mushrooms.
Enjoy Your Homegrown Cordyceps Mushrooms
Congratulations on successfully growing your own cordyceps mushrooms! Now that you have put in the time and effort to cultivate these fascinating fungi, it’s time to reap the rewards of your labor. With its unique flavor profile, cordyceps can be used in many culinary delights. If you want to improve your health you can dry them and brew tea from these mushrooms, or for something more convenient you can ground them up, place them in gel capsules and create a DIY supplement. Now that you have mastered the art of growing cordyceps mushrooms, the possibilities are endless. Enjoy exploring the culinary and health-enhancing opportunities they provide.