Table of Contents
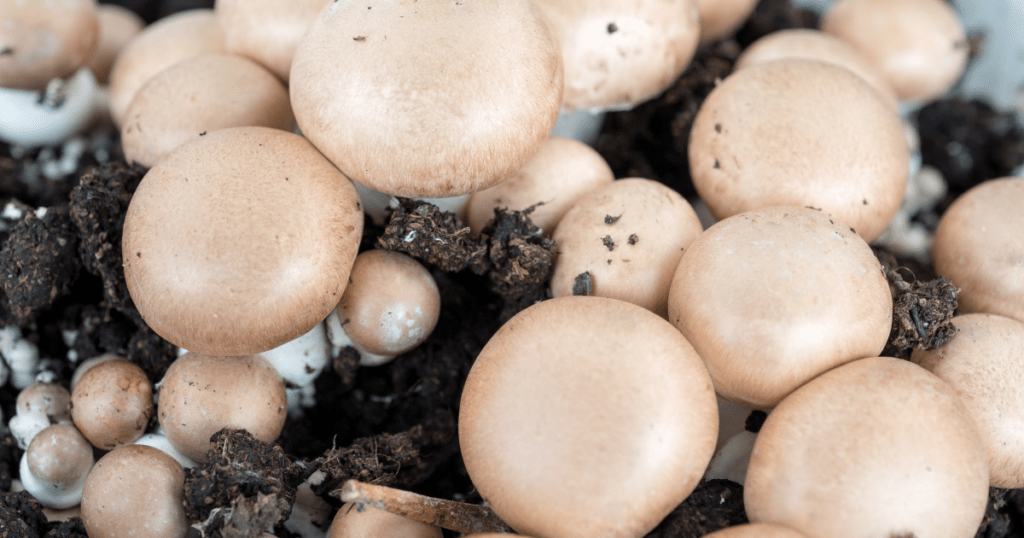
Chestnut mushrooms are a very popular edible mushroom that you can grow at home. They make a great gourmet mushroom because of their heartiness and tenderness. They also provide certain health benefits that people enjoy. Growing chestnut mushrooms doesn’t require much investment, so read the steps in this guide and get started!
Chestnut mushrooms also have a scientific name, which is pholiota adiposa. Chestnut mushrooms grow in a few places across the world. You can find pholiota adiposa, or Chestnut mushrooms, growing on beech trees in Northwestern Europe in countries like England.
These mushrooms prefer environments that don’t get too hot or too cold, with relatively high humidity for much of the year. This is exactly the type of environment you can replicate at home to grow great chestnut mushrooms.
Required Materials for Chestnut Mushrooms
Chestnut Mushroom Spore Syringe (Amazon) – Supplemented Sawdust Grow Bag (Amazon)
(For a guide on using mushroom grow bags, visit our page here)
In this guide, we’re focusing on the easiest way to grow chestnut mushrooms at home. For this reason, we select the only 2 things you will need. These 2 items are the spore syringe that contains chestnut mushrooms, along with a pre-sterilized spawn bag that you will put the spores into.
Using a spawn bag and a spore syringe from online makes this process very easy. You don’t need to go forage for mushrooms to create a spawn or culture from, you can simply buy the syringe. Secondly, you don’t need to create a supplemented sawdust spawn bag, as you can just buy this.
You can create these materials by yourself at home, but for the sake of this guide, we will cover this easy method.
Helpful tip: Chestnut mushrooms can be cooked straight from their fresh form, but some people like to dry and grind their mushrooms up and consume them as a supplement. If you want to do this, you will need to get a food dehydrator to dry the mushrooms out. You can find a good food dehydrator on Amazon here.

Using the food dehydrator will allow you to safely dry the mushrooms quickly, so you can then crush then into a powder to then use them for your intended purposes.
Steps on growing chestnut mushrooms
Inoculation of the Spores
Now that you have your chestnut spore syringe and mushroom grow bag filled with sterilized, supplemented sawdust, you are ready to grow your mushrooms.
Unpack your sterilized sawdust bag from the box, but don’t completely open it!
The whole point of buying a sterile sawdust spawn bag is that the contents are sterile and uncontaminated. If you open the spawn bag, you expose it to fresh air and this can very quickly cause the contents to grow mold and rot, so don’t make this mistake!
Take your spore syringe and prepare it by unwrapping it, and carefully placing the sharp metal syringe on the front of the plunger.
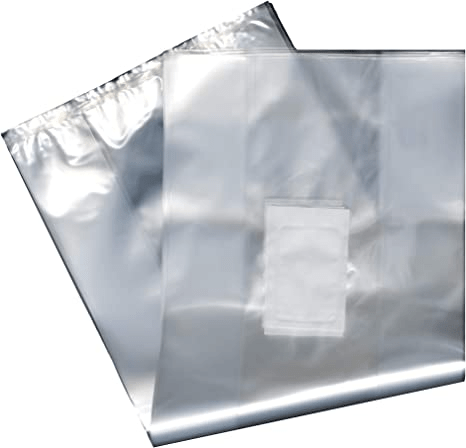
Your spawn bag should have an obvious place where you will be injecting the spores. This is the micron filter. This is a self-healing hole that you allows you to inject the spores into the bag, and then it will close up not allowing any contamination.
Take your syringe and inject about 4-6 drops of your syringe into the micron filter of the spawn bag. This is what the micron filter should look like:
Further, this mechanism of grow bags keeps the contents of the bag sterile from any contamination. Contamination is a primary killer of successful mushroom grows. This is why using pre-manufactured, sterilized grow bags is so important.
This is pretty much the only manual part of this process. Now that your spores are in the bag, simply leave it be and don’t tamper with it too much. It may seem simple, but with this method it really is that simple!
Colonization of the chestnut mushroom grow bag
You want to complete the spore injection and then immediately place this bag in a place where it will be kept mostly undisturbed for a few weeks. The spores will naturally begin to attach to the organic material inside the sawdust and consume it over the course of 3-5 weeks.
Place the bag in a relatively temperature-stable room. The same as the introduction, you will want to keep the spawn bag in an environment that is closest to the natural environment as possible. This means around temperatures of 65-70F. Thankfully, this is the temperature that most houses are usually set to.
So, you should be able to place your freshly inoculated spawn bag on a shelf in a closet or other room of your home.
You don’t need to worry about light too much with growing chestnut mushrooms. If you want to introduce a small amount of natural light, this should only stand to help.
What does colonization of mushrooms look like?
After a week or two, you can check on your chestnut grow bag. The colonization of the grow bag should have started. Colonization is the term for when the mushroom mycelium begins to grow around the entire spawn material, the sawdust in this case. This is the mushroom consuming the organic material and water.
Mushroom mycelium has white, web-like appearance. This material can look like mold, because mushrooms are a type of mold! If you see this, your grow is going well.
At this point, if your spawn material was compromised by any outside mold, you will see this visibly. The spawn bag will have an unrecognizable growth somewhere in the bag. This may be a color like blue, purple, or green.
If you see a mold that does not look like mushroom mycelium in the image above, you must discard this grow bag! It’s no longer usable and your grow is compromised. But, be careful, because proper mycelium growth can resemble mold. If it is any color other than white or cream, throw it away.
The fruiting stage of chestnut mushroom growing
After you can successfully confirm that the mycelium is colonizing the entire material inside the bag without any outside mold, you are ready to enter the fruiting stage.
Only attempt to fruit chestnut mushrooms once the colonization is complete. If you start this prematurely, you risk mold contamination or a delayed fruiting process.
Secondly, if you wait too long, the mushrooms will begin to fruit inside the bag, which is not something you want, although this is salvageable and you will simply begin fruiting then.
Starting the fruiting process
You will begin the fruiting process by cutting a small slit/hole about 2-3 inches wide in the side of the bag. This is where the chestnut mushrooms will grow from. It doesn’t really matter where you make the hole, as long as you create one hole large enough. This is because chestnut mushrooms grow in clusters.
By creating the hole, the fruiting stage is initiated with fresh air exchange. When the mushrooms get the fresh air from the hole, they begin to fruit well.
Be careful not to cut deeply into the mycelium growth. You don’t want to damage the mycelium heavily, just cut a hole so that fresh air exchange can begin and your mushrooms have somewhere to fruit.
See this example of mushrooms fruiting from spawn bags. The mushrooms grow out of the side of the spawn bag just like this. Instead of multiple holes like this example, you only need one hole for the chestnut mushrooms to grow out of.
In order to induce good fruiting, you can also bring some light to the bag. The mushrooms will react to the light by fruiting faster and larger, if all other factors are present. At this point, it’s OK to move the grow bag to a new location, just be careful not to stir up the spawn bag too much when you move it.
We have a comprehensive article on using light in mushroom growing here.
Completing the chestnut fruiting process
Now, after about 2-3 weeks of initiating the fruiting process, you can expect to see chestnut mushrooms growing out of the hole. This means everything is going well, and you’re about to have some fantastic mushrooms on your hands, but patience is still key!
This is the part where you want to keep a close eye on your mushrooms. The good thing is, chestnut mushrooms fruit slower than many other mushrooms. The fruiting process can take about 2-3 weeks.
All you need to do during the fruiting stage is simply watch the mushrooms as they grow and mist with water if the spawn material seems dry. Misting is especially important if your growing area is dry to begin with. Misting can only help your mushrooms, so prepare to mist your mushrooms about once or twice a day.
Once your chestnut mushrooms reach ideal length, cut them from just above the bottom of the stem. The bottom part of the stem is mostly inedible, so don’t worry about consuming it.
Harvesting gourmet mushrooms is all about timing. If you harvest too early, you won’t get much for all of your hard work. But, if you harvest too late, the mushrooms become stiff and inedible. The best time to harvest will be when the mushrooms have reached ideal length and not much longer.
Now, we recommend immediately putting your mushrooms in the fridge. You can store chestnut mushrooms in the fridge for a few days, but you need to consume them quickly. In general, mushrooms don’t store very well for very long. After about a week in the fridge, the mushrooms become soggy and degrade.
You also cannot freeze mushrooms, as the freezing process will break down the mushroom cell walls making them soggy and inedible.
If you want to dry the mushrooms out and use them as a seasoning or supplement, you will want to start the drying process immediately. This means putting the mushrooms in a food dehydrator and drying them for about 6-8 hours until they are completely dry. Once they are dry, your mushrooms can be stored safely for a long time.
Conclusion
Congratulations, you have completed the guide on the easiest way to grow chestnut mushrooms at home.
As a quick tip, chestnut mushrooms are not a mushroom that will fruit multiple times from the same spawn bag. You will have to grow multiple bags if you want multiple flushes of chestnut mushrooms. Thankfully, this process is very repeatable so you can do this as much or as many times as you want.
Remember, always follow the guides on our website closely and do not rush the process. Skipping steps when growing mushrooms will lead to stunted growth or even failed grows. You also increase the risk of contamination when you try to skip steps.
Now, you can experiment more with growing this type of mushroom outdoors, using nature to guide the way. See our outdoor mushroom growing guide here.